Tutorial:
In answer to several questions along the lines of "How do I do that?", I have the pleasure of presenting a step-by-step tutorial on the methods I use to add color to black-and-white line art work.
I start with (of course) the line art. Most of the time, this will be a drawing I've done on paper (penciled then inked), scanned into Photoshop. Lately, I have been trying to improve my computer drawing skills, using MetaCreations Corel Painter and bypassing paper altogether. I like the look of the "ink" lines you get in Painter (using the "scratchboard" tool, strangely enough) better than the "brush" tool in Photoshop; but I still prefer the look of "hand-drawn" scanned artwork.
(This tutorial assumes you have a drawing tablet - trying to do this with a mouse is like trying to draw with a brick! - and at least a basic knowledge of Photoshop: creating layers, changing a layer's mode or composite method, and creating selections and masks. Teaching how to use Photoshop itself would be well beyond the scope of this session, since I'm still learning its ins and outs myself; it may well be that someone reading this page may know of an even simpler way.)
Step 1 |
|
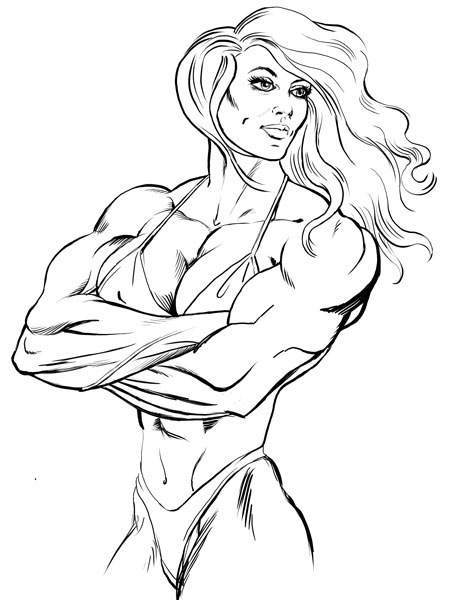 |
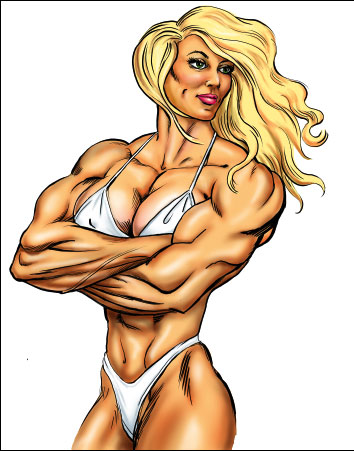
So: we start with our line art. A drawing on paper would usually be scanned at 150 pixels/dots per inch (dpi), in anticipation of possible future print uses; if I know the drawing will never be published except on monitor screens, then a 72-dpi scan is adequate. (Higher resolutions will result in large files; my finished files tend to weigh in at 25 MB or more.) For this example, however, I'm using a drawing of Satin Steele I "inked" in Painter, cloned from this illustration. Open the drawing in Photoshop, and create a new layer. This will be the layer that I color the figure on; I usually caption this layer "color layer". (Clever, neh?) Set its composite method (mode) to "Multiply", so the black lines from the background layer still show through when you start coloring. |
Step 2 |
|
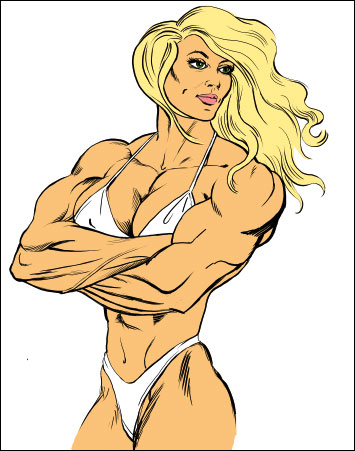 |
On the new "color layer", I begin blocking in the basic colors of each area - skin tones, hair, bikini, etc. I do this by outlining each area in the desired color, and then filling with the "paint bucket" tool. This requires frequent hiding of the background (line art) layer, to make sure all the areas are enclosed to prevent the paint bucket fill from "leaking" to the rest of the layer. The result of all this effort should look like the example at left (click on it to see a larger version)... |
 |
...and like this with the background (line art) layer hidden. |
Step 3 |
|
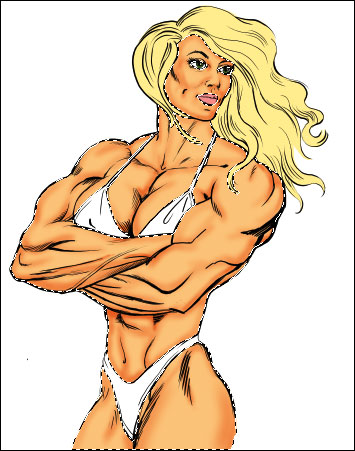 |
With the Magic Wand tool, I select all the areas of the same color, usually beginning with the flesh tones. The non-selected areas now act as "virtual friskets" to protect those areas from "overspray". My usual method is to work from the base color (the mid-tones) darker to the shaded areas, then lighter to the highlighted areas. So, choosing a deep orange from the Swatches palette, I start working the darker areas with the Airbrush tool, bringing out the rounded forms of the cheeks and chin on her face, and the muscles and breasts of her physique. |
 |
If you can spare the RAM and disk space, saving the selections for skin tones, hair, etc. would be a good idea.
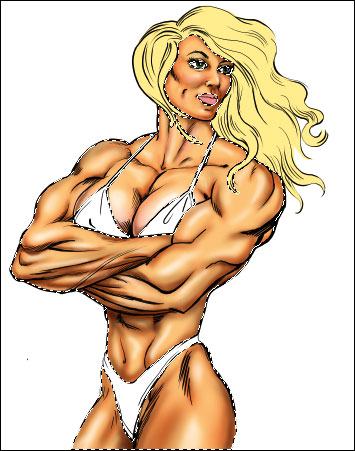
The picture at the left now shows the flesh tones fully developed, with a darker brown deepening the shadows and white highlights accenting the forms. Now, repeating the process of selecting the other areas (hair, for example), saving the selection, and applying the colors... |
 |
...gives the result in the illustration here. This shows all the parts of the figure, including the lips, eyes and bikini, fully colored and detailed.
Now, we add a background... |
Step 4 |
|
 |
Create a new layer for your background. (Let's call it "Backdrop", so as not to confuse it with the "background" layer of the Photoshop file.)
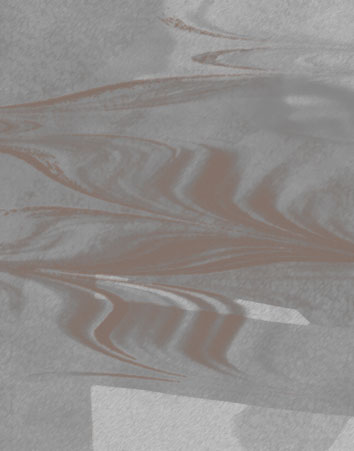
In this picture, as in most of my "figure" shots, I went for the look of a photographer's studio backdrop. Almost anything goes here, as far as method or technique is concerned: you could fill the new layer with a gradient, run the "Render>Clouds" filter on it, tinker with the colors using Levels, whatever. (Click the pic at left to see what I came up with.) This is going to seem to cover the rest of your drawing, so you need to rearrange your layers as follows: From the bottom up, Background layer (line art), Backdrop layer (just created), then Color Layer. Now, your figure colors are going to look translucent, with no line art, against the Backdrop. A Layer Mask will fix that... |
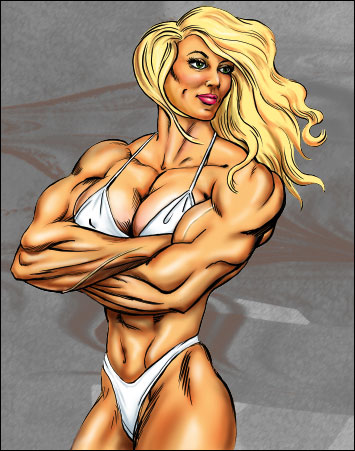 |
Make the Color Layer the active layer, and use the Magic Wand to select the "background" of that layer. Invert the selection so that now the figure is selected. (I highly suggest also hiding all but the Background layer, activating that layer, and tweaking the selection in Quick Mask mode so that the line work around the edges of the figure will show when the Layer Mask is applied.) Once you exit Quick Mask Mode, save this selection! It will be useful later for adding a drop shadow. Now, show all the layers, activate the Backdrop layer (with the selection marquee "marching ants" still visible), and from the menu select Layer>Add Layer Mask>Hide Selection. Poof! the line work from the Background layer should appear, and the Backdrop behind the figure should disappear. The edges of the layer mask may still need some refinement, which can be done by clicking on the Backdrop layer's mask icon and using the Eraser and Pen or Pencil tools to add to or trim from the layer mask. The finished result of this step should look like the illo at left.
One more task to accomplish... |
 |
The drop shadow:
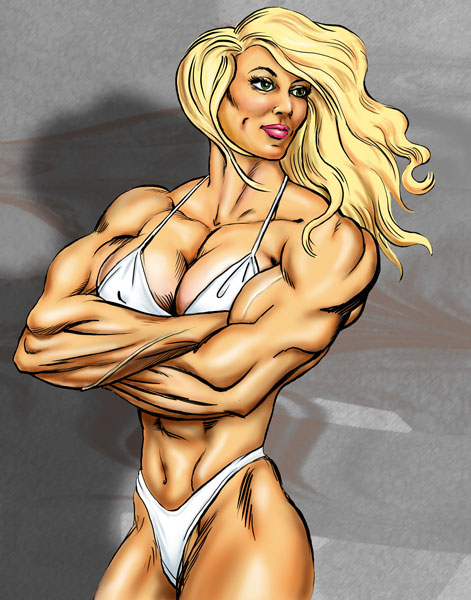
Create a new layer just above the Backdrop layer, load the figure selection you saved from the previous step, and fill the selection with black at 50%. Move the shadow to wherever you think it looks appropriate, and deselect. Now, run the Gaussian Blur filter to soften the edges of the shadow. Choose Layer>Merge Down to merge the shadow layer with the Backdrop layer beneath it. That's it! Save the finished file, and save a copy at reduced size in JPEG form for Web display. (Photoshop 5.5's new "Save for Web" feature is great for this!) The finished JPEG pic of the example project is to the left. |
©2000 David C. Matthews